Damage
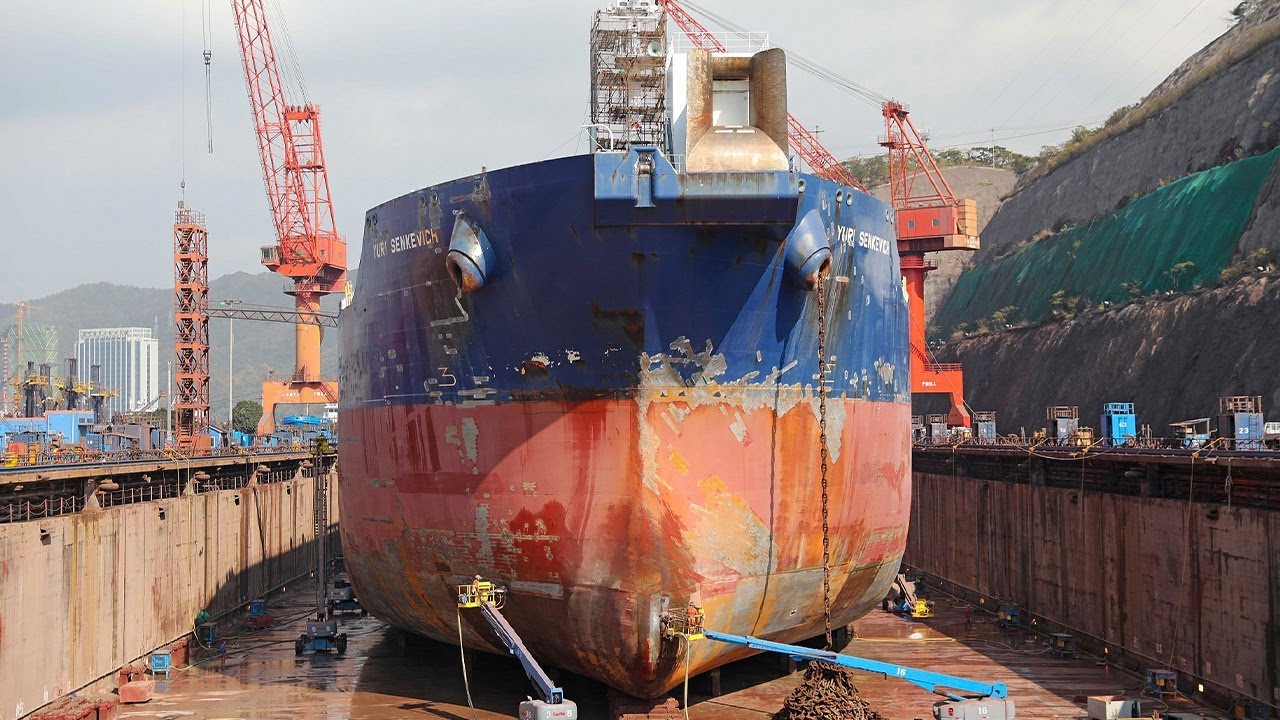
This represents reduction of the health of the ship component through direct
impact of weapons, collisions or exposure to damaging effects of heat and
radiation. Whether that is an installed module, or integrated component such as
the ships hull, cockpit viewports or ship armor. Damage is corrected through
Repair.
Wear.
This represents the degradation of ship components over time through use.
Whether that is an installed module, or integrated component such as the ships
hull, cockpit viewports or ship armor. Wear is corrected through maintenance.
Aging:
This represents the gradual degradation of the overall ships condition. This is
mostly cosmetic and affects the ship as whole not individual components. Things
like the appearance of scratches on the cockpit viewports, the condition of the
paint, interior surfaces and upholstery. Aging is corrected through
restoration.
Causes
Causes of Wear and Damage. The loss of original qualities is associated with the appearance of various forms of damage caused by:
a. Frictional
wear,
b. Corrosion,
c. Erosion,
d. Metal
fatigue,
e. Heating
of parts to high temperatures
f. Change
in metal structure,
g. Poor
construction and inadequate repairs,
h. Arduous
working conditions
j. Break
downs, etc.
Effects.
Damage.
As a measure of the health of a component, this would reduce the components
effectiveness as damage is accumulated. It should be an escalating scale from
perfect working order to no longer functioning. Having 100% damage does not
destroy the component but merely renders it inoperable until repaired and its
damage reduced to at least 99% damage. This effect is applied to and tracked
individually by each component.
Wear. As a
measure of gradual degradation, this would represent the likeliness for a
component to suffer a random failure or suffer critical damage. A random
failure represents a temporary and premature failure of the component. A random
failure can be resolved through the repair of just 1% damage. This can be
accomplished by an auto repair unit or through the shutdown and repair feature.
Critical damage represents a damaging event to the component that applies 25%
damage to the component but does not cause component failure unless the total
damage reaches 100% by this event. A component with 100% wear is still fully
functional but more likely to fail or suffer damage. Think of this as
reliability. At 100% wear it would represent a 25% likelihood of either random
failure or critical damage when taking additional damage or module activation.
This effect is applied to.
Aging. As a overall measure of ship condition this
has little effect on the capabilities of the ship or its components but serves
primarily as a visual measure of the life the ship has lived. As ship with a
low level of aging will look like it just rolled off the showroom floor while a
ship with a high level of aging will look like its been through a rough life.
It could also work in the same way as wear but to a much smaller degree and
would affect all components equally. At 100% aging it would represent an
additional 5% likelihood of a random failure or critical damage. This effect is
applied to the ship as a whole.Cylindrical parts can become elliptical
conical, or barrel shaped. As a result of the wearing process, the oil
clearances are also changed the alignment of parts and machinery is disturbed
and scuffing of the rubbing surfaces may occur.
Method to
Detecting the Damage. To determine the condition of parts
mechanisms, or engine elements, and to ascertain the amount of maintenance
work, it is necessary to test them thoroughly when making defect survey. These
tests arc made using methods of;
a.
Physical Procedures. Physical procedures include X-ray,
gamma-ray, ultrasonic, magnetic, luminescent, and colour tests. These methods
of defect analysis permit the detection of defects in castings or forgings
(slag inclusions, cavities, gas pores, cracks), in welded joints and ready-made
articles.
b. Technological Inspection
Uses of Physical Procedures. X-ray,
gamma-ray, and ultrasonic inspection is used mainly to detect internal defects
in metals magnetic inspection to defect subsurface and surface defects, and
Luminescent and colour inspection to detect surface defects.
Advantages of Physical Procedures. The
advantages or physical, procedures include their relative simplicity high
sensitivity accuracy and the possibility in many cases of detection defects
without dismantling the individual units and connecting.
Technological Inspection. Technological
inspection procedures consist in visual inspection (with various degrees of
magnification), dimensional, measurements, chalk —kerosene and magnetic
—kerosene methods, electrolytic etching tightness etc.
Method of Finding the Thickness of Ships
a.
Liner dial gauge. The
linear dial gauge has a socket 1 and a retaining sleeve with a claw 2 the
indicator spindle is pointer, and the socket is fitted to the upper end of the
indicator in such a way that the point of the needle coincides with the upper
plane of the socket .At the other end of the indicator there is the retaining sleeve
with the claw pointer set so that the points of the needle claw are in contact.
The indicator should read zero at this setting. The indicator permits
measurements of thickness up to 10 min: with a greater thickness, the claw and
needle points are set for a gap of 10min. and this figure is added to the
subsequent readings of the indicator.
b. Two rulers system. When measuring the corrosion damage in the shell plating, double bottom bulkheads , and other parts , plates with the most extensive damage are chosen .When pits are present on the surface of the plates the amount of damage is determined in the following way. On each plate a square circumscribing the most affected parts is chosen, the area of the square is measured and an estimate is made of the areas of the pit and cavities. The means thickness of the wasted plates round and inside the cavities is also found.
c. To find the area affected by the cavities, a grid is chalked, or a frame with a wire grid is placed on the surface under consideration. The area of each cavity is estimated against the area of the superimposed grid squares.
d. The ratio of the number of affected squares to the total number of squares in the frame, multiplied by 100 gives the percentage area of damage in the given region. Where the pitting type of corrosion is not present, the trickiness of a given zone is taken as the mean of several readings. Then the mean thickness of other zones within the tested portion of the plating is found.
e. The depth of a cavity may be found using an indicator which is placed so that the probing socket 1 rests against the surface or making a cast replica of the cavity in plasticine, wax, or stearin and measuring its height.
Method of
Detecting Surface Crack. Crake
are a form of damage which is most widely distributed over parts of hull,
boilers and machine parts. Below, a description is given of the most common
methods of detecting cracks.
a.
Visual Method. The visual method consists in observing with naked eye or
through a magnifying glass the surface of plate, machine part, welded seam,
etc. The method is simple but very tedious and not always reliable, since the
smaller cracks are difficult to detect. Only visible cracks can be revealed by
the naked eye .A strong illumination of the examined surface helps in detecting
cracks. Smaller cracks can be revealed with the aid of a magnifying glass.
b.
Chalk—Kerosene Methods. Chalk
—kerosene methods are used for detecting cracks and also in tests for tightness,
continuity of plate laps and butts quality of seams. etc. The detection of
cracks on the surface and the determination of their extent are carried out as
follows. The area under examination is thoroughly cleaned and copiously wetted
with kerosene; then it is wiped dry and covered with a chalk solution with
chalk. Next the tested zone is vibrated by hammer blows using a copper
protecting plate, near test area. The presence and extent of a crack are
revealed by a greasy trace caused by absorption of kerosene by the chalk .The
vibration causes the egress of the kerosene from the crack. When testing welded
seams both sides of the seam should be cleaned and dried. Then the seam is
wetted with kerosene so that a thin film of kerosene is present on the surface during
the test.
c.
Magnetic Testing Methods. Magnetic
testing methods have found. a wide application in detecting cracks in steel and
cast iron parts, owing to their relative simplicity and effectiveness.
The principle of the method is to
magnetize the part and apply iron powder to its surface. In the wet version,
the powder is introduced to a receptacle containing dehydrated kerosene and the
part immersed. The iron powder will concentrate along the boundaries of the
cracks as a result of the formation of supplementary poles.
The wet magnetic method finds
application in ,for example, examinations of turbine blades .A container with
the mixture of dehydrated kerosene and iron powder is placed under the
magnetized disks and blades; Rotating the rotor- the blades are immersed and
thoroughly examined for concentration of iron powder denoting cracks .The dry
method is less widely used than the wet method.
d.
Electrolytic Etching. Electrolytic etching is used to reveal cracks
fissures and slag inclusions. As a result of etching the cracks and fissures
are marked with corrosion products, and slag inclusions are indicated as light
streaks.
In etching the part is placed as an
anode in an electrolytic bath. A mixture of 2% nitric acid and 2% sulphuric
acid is used as electrolyte, and a plate of stainless steel as the cathode ,
The parts remain in the bath for 10 to 12 min , with a voltage of 10V and
current density of 0.1 A per square centimeter of the tested surface . The
examination is made after removed of the parts from the bath when they are
still wet.
e.
Etching the Surface in Acid Solutions. Etching the surface in acid solutions is
analogous to the etching revealed clearly because their edges are attacked more
strongly than the rest of the surface.
Importance of Watertight Integrity. If flooding of one compartment as a
result of damage to the hull or the failure of an internal pipe system carrying
liquids, specially if under pressure, is
to be prevented from spreading to adjoining compartments progressively throw
out the ship, it is essential that compartment boundaries be maintained in a
completely watertight condition. This entails absolute integrity of decks and
bulkheads, and complete water tightness of fittings in them which control
necessary openings such as doors hatches, valves and glands. As an example of
the problem , a hole only 129 sq mm in the hull 3 mtr below the waterline will admit water at a
rate greater then a submersible pump [ 40 tone / hour capacity] can remove it
an equivalent area can easily be made up of the sum of a number of small holes,
e.g bolt holes and cable glands left open after equipment or cables have been
removed, leaking door and hatch joints, defective ventilation valves, etc.
Checking of Watertight Integrity. To ensure that compartments retain their water tightness it is necessary to carry out regular and thorough visual examinations to detect the more obvious sources of leakage backed up by routine tests to reveal any hidden or less readily visible leaks that may exist. It is especially important to check compartments in which structural or other work has taken place which could affect their watertight (or gastight) integrity; for example, when equipments have been removed during a refit. Any shortcomings revealed by visual examination or by tests must be rectified as soon as possible. The succeeding paragraphs describe briefly the tests which are to be carried out by ship's staff to check the water tightness of compartment boundaries and closures. Detailed information about these tests and lists of compartments to be tested are contained in BR 3000, hull maintenance schedules and hull ship equipment lists.
Bulkhead. Bulkheads Vertical partitions in a ship
arranged transversely or fore and aft are referred to as `bulkheads'. Those
bulkheads which are of greatest importance are the main transverse and
longitudinal bulkheads dividing the ship into a number of compartments. There
are others, which are of little structural importance, but they act as screens
further dividing compartments into small units of accommodation and stores.
Types of Bulkhead.
a. According to position there are two types of bulkheads construct in ship building:
(1) Longitudinal Bulkhead.
2) Transverse Bulkhead.
b. According
to function bulkheads are generally two groups:
(1) Water tight (WT) Bulkhead.
(2) Non Water tight (WT) Bulkhead.
c. According
to use of shell plate, bulkheads are generally two groups:
(1) Corrugated Bulkhead.
(2) Plane Bulkhead.
Function of Bulkhead. Bulkheads
fulfils following function:
a.
They
hold the ship to form and effort support local loads, Such as are more decks,
gun mountings etc.
b.
Main
bulkheads contribute largely to structural strength and protect important
compartments against under water expolsion.
c.
Bulkheads
are an important element of transverse strength, particularly against racking
stresses.
d.
By
dividing the ship into longitudinal subdivision, they also give protection
against fire and foundering.
Fitting of Bulkhead. It
may be fitted in the ship longitudinally and transversally according to the
ships length and design.
Transverse Bulkhead. The
fore most transverse bulkhead usually about 30 ft from the bow is large ship is
called the collision bulkhead. it is continuous from the keel to the fore
castle deck and well stiffened vertically.
Main
transverse bulkhead are generally worked in horizontal strake with the vertical
stiffening between main machinery compartment the bulkhead extended from the
protective deck to the inner bottom without support from deck or flats.
Longitudinal Bulkhead. The
number and deposition of main longitudinal bulkheads depends on the class of
ship capital ships have generally three such bulkheads a amidships the inner
one bounding the main machinery compartments and the outer one constructed and
the outer constructed to prov9ide protection against under water explosion.
Use of Bulkhead. The
watertight bulkhead of a ship has several functions to perform. They are:
a.
They
provide the ship into watertight compartment.
b.
The
watertight bulkhead also serves to separate different types of cargo and to
provide tanks.
c.
In
the event of fire the bulkhead reduce to a great extend the rate of spread.
d.
The
transverse strength of the ship is increased by the bulkheads.
e.
This
prevent under distortion of the shell side reduce racking considerably.
f.
Longitudinal
deck girders and deck longitudinal are supported at the bulkheads which
therefore act as pillar.
Corrugated Bulkhead. Due
to shape and design there is a another bulkhead named corrugated bulkhead this
may come from as transverse and longitudinal as design generally it is fitted
in the liquid tank to reduce the free surface effect.
Water Tight Subdivision. Water tight subdivision achieved by:
a. Main
transverse bulkhead.
b. Main
longitudinal bulkhead.
c. Watertight
door and hatches.
d. Watertight
deck
e. Double
bottom.
f. Some
minor bulkhead.
Advantage of Watertight Subdivision. Following are the advantage of water tight
subdivision:
a. It
contributes the strength of the ship.
b. It
increases the resistance to damage of the ship.
c. It
localities or limits the hooding and fire.
d. It
contributes or increases the reserve buoyancy.
e. It
improves the habitability.
f. It improves facility to presentation of stores water fuel etc.


:quality(70)/cloudfront-us-east-1.images.arcpublishing.com/archetype/ETDNHU3UKJEKLHOOJX5YH6T4FQ.jpg)

:quality(70)/cloudfront-us-east-1.images.arcpublishing.com/archetype/RXPXFWGMK5CJDEGKVUADNWTME4.jpg)
No comments:
Post a Comment